Sometimes you over provision a server and need the space back on your cluster shared volume or use a full fixed size disc and later want a dynamic one and then need to shrink it. Or it could simply be you are making a template and want to compact the disk as much as possible for faster deployments and less disk space consumed on your VMM server.
Some of the steps here are also useful if you just want to find additional space on a windows server. Step 1 outlines how to cleanup the component store and remove installation files for unused windows features. (e.g. why keep the source files for the Remote desktop session host server role on a web server?) You can skip step 4 if you are just looking to shrink the file temporarily, if the VHDX is for a VMM template or if you are just cleaning up a working server for more free space.
Here is the process:
1. Clean up the disk first and remove any files or data you don’t need so that you can compact the disk as much as possible.
Here are a few options:
You can remove the source installation files for any roles and features you don’t need to save on disk space. This can make it difficult or sometimes impossible to enable the features later though so proceed only if you are sure you don’t need other roles to be added later. Make sure to run this in an Admin powershell window.
Get-WindowsFeature | Where-Object {$_.Installed -match “False”} | Uninstall-WindowsFeature –Remove
For 2012 R2 and other later windows versions you can also clean up the component store with DISM. This does mean you won’t be able to remove existing service packs and updates however future updates will be removable.
Dism.exe /online /Cleanup-Image /StartComponentCleanup /ResetBase
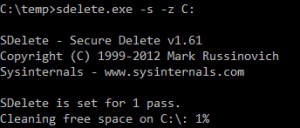
Clean up any temporary files, old profiles and all the other places you would usually look to free up more space. 2. Grab a copy of the sysinternal Sdelete tool and use it to zero the deleted files on the disk. This step is not essential but you will get better results if you do it. I would recommend skipping this step if you are using an SSD on a physical machine.
https://technet.microsoft.com/en-us/sysinternals/bb897443.aspx
This command assumes you are on the machine you want to shrink:
C:\pathtofile\sdelete.exe -s -z c:
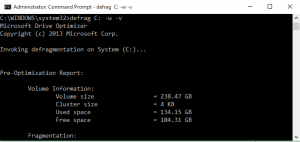
3. Defragment the disk. You can run this from within the guest OS but you may get better results shutting down the VM and mounting the VHDX file on another system. This way all the files can be defragmented.
defrag C: -w –v
4. Consider shrinking the partition. It maybe if you are making a template you want to keep a large partition as you expect and want the VHDX to grow after it is deployed. (If that is the case skip this step) If you are looking for a more permanent shrink then you should now shrink the partition to the desired size. This is best accomplished in the disk management GUI or with PowerShell.
This assumes you only have one local disk and know the size you want to resize to, if this isn’t the case use get-partition to work out the correct numbers for your situation and use Get-PartitionSupportedSize to view the possible sizes you could shrink to.
Resize-Partition -DiskNumber 1 -PartitionNumber 1 –size 30GB 5. Now use the Hyper-V, VMM or failover cluster manager GUI to compact the VHD.
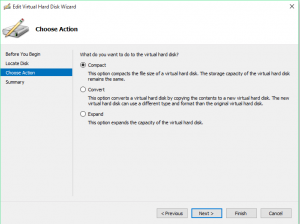
5. Compact the VHDX. The quickest method is to use the Hyper-V, VMM or failover cluster manager GUI to compact the VHD. e.g. right click on the VM>Select settings>Left click on the disk>click “Edit”>Click “Next”>Select “Compact”>Click “Next”>Review the change summary screen and click on “Finish.” This might take some time if there is a lot to shrink. The VM also needs to be powered off for this final step.
Happy shrinking!


