Configuring normalization rules for the Lync 2010 address book

Lync by default automatically pulls telephone information from active directory and publishes it to clients each morning at 1.30AM however often the telephone numbers entered in active directory have various problems, inconsistencies or are otherwise not formatted correctly for Lync to use.  If this is the case you may notice contact cards in the Lync client contain no phone numbers (or have some numbers missing) while if you examine the user in outlook or directly in active directory you can clearly see telephone numbers are configured for them.  Lync will only function with E.164 style numbers and as a result unless all of your numbers are stored correctly in this format, many will be missing.

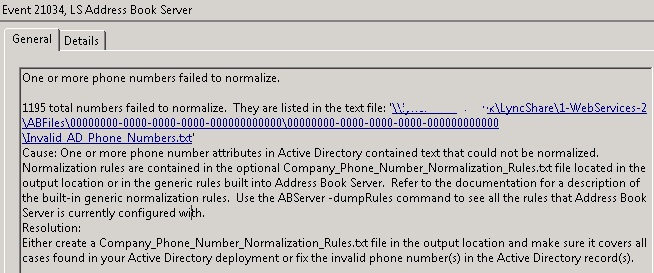
A full list of numbers which fail to normalize can be found in the Lync Server event log of your front end server.  (normally logged shortly after 1:30AM) with event ID 21034.


As you can see there is a handy link to a file which contains a full list of the failed numbers.  The ideal way to fix this would be to edit all the numbers so they are stored in the right format.  For example changing a DDI and extension from 01372 112233 and 2233 to be stored as +441122112233;ext=2233 often this isn’t possible or desirable if other applications use these numbers and instead it maybe preferable (and quicker) to follow what the text in the event log suggests and setup normalization rules in the optional “Company_Phone_Number_Normalization_Rules.txt” file.

This was the case for me recently and I ended up creating the following rule to normalize standard UK national numbers into international E.164 style numbers:

## match National to UK E.164
\+?0([1-9]\d{7,9})
+44$1

(where +44 is your country code)

In an ideal world all your extension numbers will match your DDI numbers as well so you can normalize them with a rule similar to this:

## 9xxx extn into ddi
\+?(9\d\d\d)
+44112233$1;ext=$1

(where +44112233 is the appropriate area and regional code)

For my environment these two rules cut the number of failed numbers to 87.  If you cant wait until 1:30AM the next morning to see the results of your changes run ” Update-CSAddressBook” in the Lync shell window and wait approximately 5 minutes for the process to complete and the messages to appear in the event log.

In addition to the above if you wish to clear the cashed address book in a Lync client first close the client and navigate to %profilepath%\AppData\Local\Microsoft\Communicator and delete the appropriate SIP folder and then restart the client.  This will force it to re-download the address book and you can instantly enjoy the results of your changes.

A great reference on how to create these rules can be found here.

Evaluating the Microsoft Private Cloud with the System Centre 2012 Unified Installer

After reading a lot about Hyper-V and attending an IT Camp at Microsoft I really wanted to give the new SCCM 2012 a closer look and at the same time get better acquainted with Hyper-V and other related upcoming Microsoft releases such as Data protection Manager and Service Manager.

Getting all the installation files and pre-requisite software downloaded

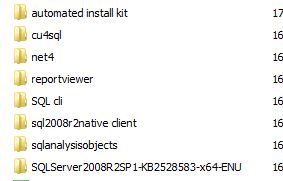
Sign up and download all the installation files here: http://technet.microsoft.com/en-us/evalcenter/hh505660 (6.6GB) and in addition to this you will need all of the pre-requisite software which is listed here: http://technet.microsoft.com/en-us/library/hh751268.aspx  I went through a fair bit of trial and error to get the set-up utility to detect all of the installation files and I recommend making sure to extract each of the products into their own folders.  Don’t put all of the products in one folder or share folders as if the installer doesn’t recognize one of the paths/files you wont be able to tell which one (plus its messy and you might end up over writing files) I would also suggest you do the same for all of the pre-requisite software. (also don’t forget to extract all of the zip/exe/iso files as the unified installer wont read them otherwise.  I found winrar invaluable for this)


Preparing the installation environment and servers

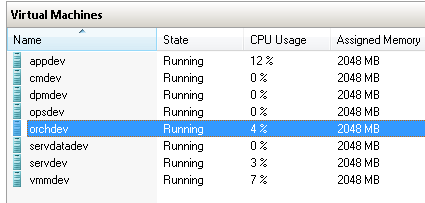
To get all the products installed you need at least 8 servers (physical or virtual) with a minimum of 2GB of ram each.  I set all mine up on a single Hyper-V host as its only for testing purposes and I don’t have loads of servers spare for development/testing work.  I would also suggest using a sensible naming convention or it can get pretty confusing quite quickly and bare in mind that the server you choose to initially run the set-up on will become the Orchestrator server.

Aside from the base windows 2008 R2 operating system all the machines need to have a few things configured before they are ready for deployment.  To avoid duplication I made sure all of the servers were in a single OU and created a policy to apply the customizations for me rather than individually configuring the local policy on each host.

Computer Config \ Administrative Templates \ System \ Credentials Delegation \ Allow Delegating Fresh Credentials
Set to = Enabled
Server = WSMAN/*

Computer Config \ Administrative Templates \ System \ Credentials Delegation \ Allow Delegating Fresh Credentials with NTLM only server Authentication
Set to = Enabled
Server = WSMAN/*

Computer Config \ Administrative Templates \ Windows Components \ Windows Remote Management (WinRM) \ WinRM Client \ Allow CredSSP authentication
Set to = Enabled

Computer Config \ Administrative Templates \ Windows Components \ Windows Remote Management (WinRM) \ WinRM Client \ Trusted Hosts
Set to = Enabled
TrustedHostList = *

Computer Config \ Administrative Templates \ Windows Components \ Windows Remote Management (WinRM) \ WinRM Service \ Allow Automatic Configuration of listeners
Set to = Enabled
IPv4 filter = *
IPv6 filter = *

Computer Config \ Administrative Templates \ Windows Components \ Windows Remote Management (WinRM) \ WinRM Service \ Allow CredSSP authentication
Set to = Enabled 

Computer config \Administrative Templates \ Network \ Network Connection \ Windows firewall \ Standard Profile \ Windows firewall Protect all network connection
Set to =  disabled

I then went round each server and ran a gpupdate to ensure they all applied the new policy before I attempted to run the unified set-up.


Running the unified installer

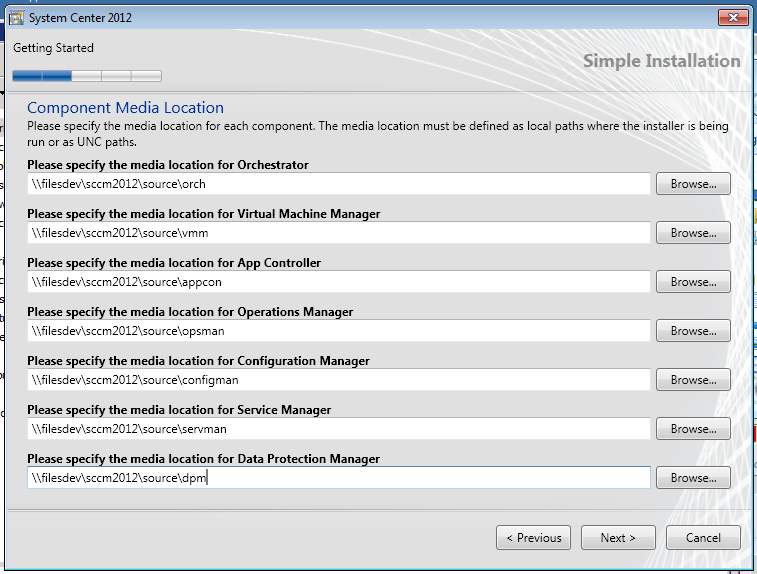
On running the unified set-up and selecting the products you are evaluating (I wanted to try all of them) you are prompted to provide a path to each of the installation files you downloaded earlier.  (I bet you are glad you downloaded and extracted each of the products/pre-requisites into their own folders now) if all is well it should be a simple exercise of browsing and selecting each of the folder paths created earlier.  Dont be surprised if it doesnt recognize one of the paths or files just make sure you have the right product/version and its extracted, even the iso file for the windows automated installation kit needs to be extracted so its just a normal folder full of files.  (UNC or local path names are both OK.)


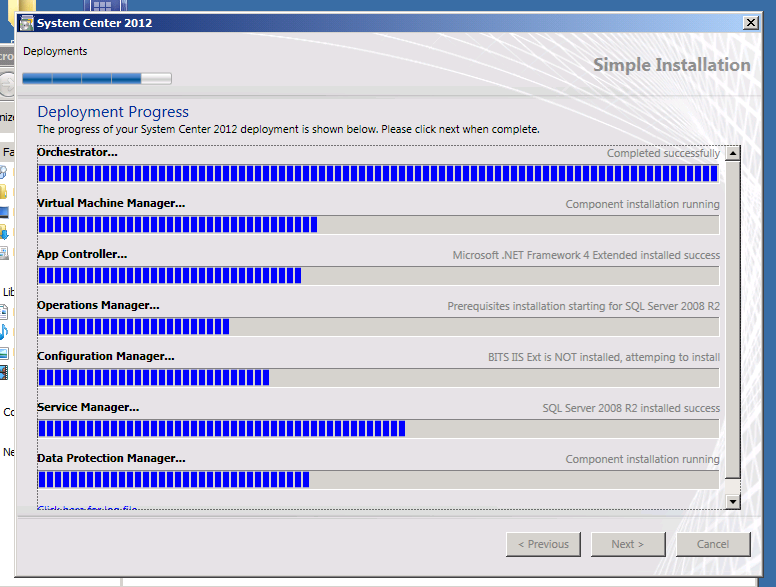
Once you have completed both this screen and the pre-requisites page that follows it you can select what account you wish to use as the installer account.  I created my own domain user for this but you can use any user account which has the required permissions.  Following this you can configure other options such as site name etc. and finally you are presented with an install button.  Sit back and watch the progress bars.